Using VMware Cloud Director and the Container Service extension you can use kubectl expose to create a service of type Load Balancer.
The Kubernetes clusters, created by the Container Service extension, can leverage the NSX Advanced Load Balancer (formerly know as AVI Load Balancer). The integration, that is done via the Cloud Controller Manager, support L4 load balancing. With the latest version of CCM, you are now be able to define a certificate per service created.
Requirements
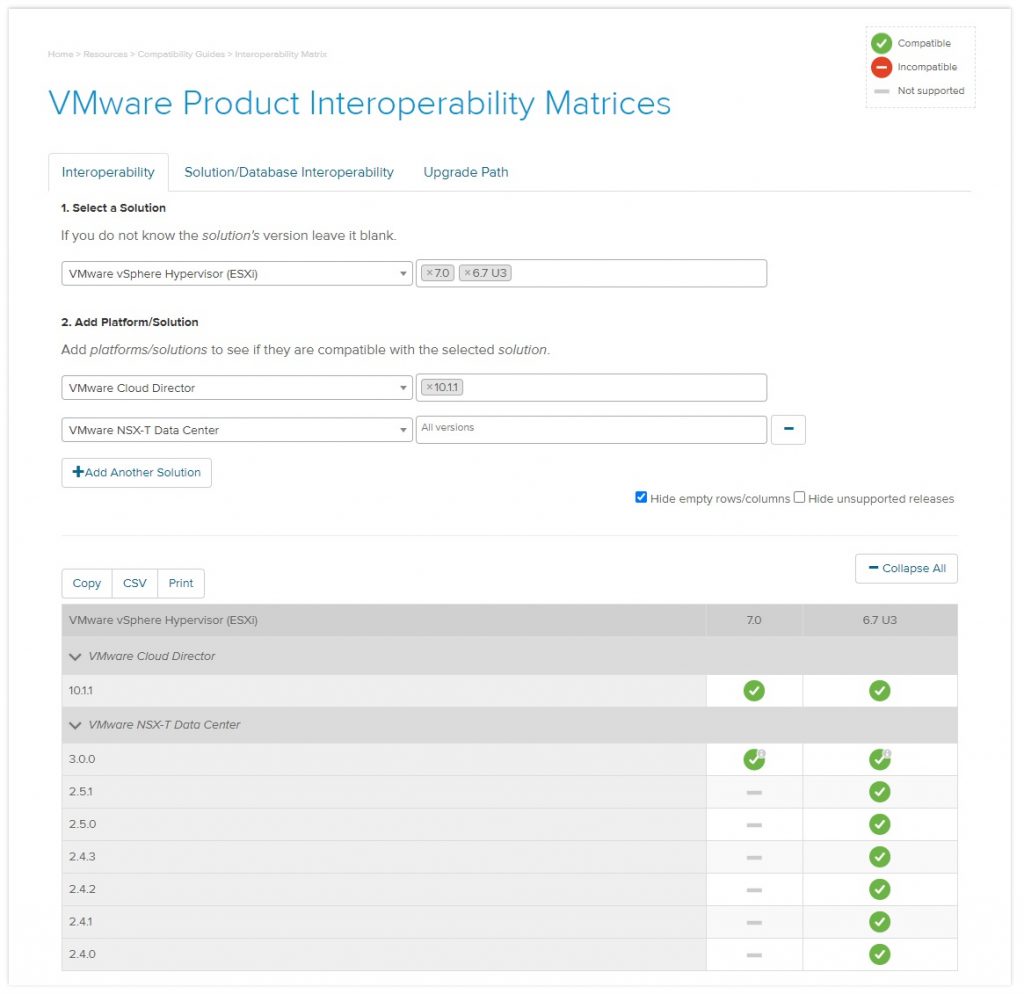
To follow the following steps, I assume that CSE 3.1.2 is deployed (CSE Installation) , NSX Advanced deployed and configured to be used by CSE (Enable NSX Advanced Load Balancer in VCD).
First of all, you have to check if CCM version 1.1.0 is deployed.
kubectl get deployment vmware-cloud-director-ccm -n kube-system
apiVersion: apps/v1
kind: Deployment
metadata:
  annotations:
    deployment.kubernetes.io/revision: "1"
    kubectl.kubernetes.io/last-applied-configuration: |
      {"apiVersion":"apps/v1","kind":"Deployment","metadata":{"annotations":{},"labels":{"app":"vmware-cloud-director-ccm"},"name":"vmware-cloud-director-ccm","namespace":"kube-system"},"spec":{"replicas":1,"revisionHistoryLimit":2,"selector":{"matchLabels":{"app":"vmware-cloud-director-ccm"}},"template":{"metadata":{"annotations":{"scheduler.alpha.kubernetes.io/critical-pod":""},"labels":{"app":"vmware-cloud-director-ccm"}},"spec":{"affinity":{"nodeAffinity":{"requiredDuringSchedulingIgnoredDuringExecution":{"nodeSelectorTerms":[{"matchExpressions":[{"key":"node-role.kubernetes.io/master","operator":"Exists"}]}]}}},"containers":[{"command":["/opt/vcloud/bin/cloud-provider-for-cloud-director","--cloud-provider=vmware-cloud-director","--cloud-config=/etc/kubernetes/vcloud/vcloud-ccm-config.yaml","--allow-untagged-cloud=true"],"image":"projects.registry.vmware.com/vmware-cloud-director/cloud-provider-for-cloud-director:1.1.0.latest","imagePullPolicy":"IfNotPresent","name":"vmware-cloud-director-ccm","volumeMounts":[{"mountPath":"/etc/kubernetes/vcloud","name":"vcloud-ccm-config-volume"},{"mountPath":"/etc/kubernetes/vcloud/basic-auth","name":"vcloud-ccm-vcloud-basic-auth-volume"}]}],"dnsPolicy":"Default","hostNetwork":true,"serviceAccountName":"cloud-controller-manager","tolerations":[{"effect":"NoSchedule","key":"node.cloudprovider.kubernetes.io/uninitialized","value":"true"},{"key":"CriticalAddonsOnly","operator":"Exists"},{"effect":"NoSchedule","key":"node-role.kubernetes.io/master"}],"volumes":[{"configMap":{"name":"vcloud-ccm-configmap"},"name":"vcloud-ccm-config-volume"},{"name":"vcloud-ccm-vcloud-basic-auth-volume","secret":{"secretName":"vcloud-basic-auth"}}]}}}}
  creationTimestamp: "2022-01-31T17:00:35Z"
  generation: 1
  labels:
    app: vmware-cloud-director-ccm
  name: vmware-cloud-director-ccm
  namespace: kube-system
  resourceVersion: "826"
  uid: 9c0ec466-03f1-41c4-81f2-ee14075c7286
spec:
  progressDeadlineSeconds: 600
  replicas: 1
  revisionHistoryLimit: 2
  selector:
    matchLabels:
      app: vmware-cloud-director-ccm
  strategy:
    rollingUpdate:
      maxSurge: 25%
      maxUnavailable: 25%
    type: RollingUpdate
  template:
    metadata:
      annotations:
        scheduler.alpha.kubernetes.io/critical-pod: ""
      creationTimestamp: null
      labels:
        app: vmware-cloud-director-ccm
    spec:
      affinity:
        nodeAffinity:
          requiredDuringSchedulingIgnoredDuringExecution:
            nodeSelectorTerms:
            - matchExpressions:
              - key: node-role.kubernetes.io/master
                operator: Exists
      containers:
      - command:
        - /opt/vcloud/bin/cloud-provider-for-cloud-director
        - --cloud-provider=vmware-cloud-director
        - --cloud-config=/etc/kubernetes/vcloud/vcloud-ccm-config.yaml
        - --allow-untagged-cloud=true
        image: projects.registry.vmware.com/vmware-cloud-director/cloud-provider-for-cloud-director:1.1.0.latest
        imagePullPolicy: IfNotPresent
        name: vmware-cloud-director-ccm
        resources: {}
        terminationMessagePath: /dev/termination-log
        terminationMessagePolicy: File
        volumeMounts:
        - mountPath: /etc/kubernetes/vcloud
          name: vcloud-ccm-config-volume
        - mountPath: /etc/kubernetes/vcloud/basic-auth
          name: vcloud-ccm-vcloud-basic-auth-volume
      dnsPolicy: Default
      hostNetwork: true
      restartPolicy: Always
      schedulerName: default-scheduler
      securityContext: {}
      serviceAccount: cloud-controller-manager
      serviceAccountName: cloud-controller-manager
      terminationGracePeriodSeconds: 30
      tolerations:
      - effect: NoSchedule
        key: node.cloudprovider.kubernetes.io/uninitialized
        value: "true"
      - key: CriticalAddonsOnly
        operator: Exists
      - effect: NoSchedule
        key: node-role.kubernetes.io/master
      volumes:
      - configMap:
          defaultMode: 420
          name: vcloud-ccm-configmap
        name: vcloud-ccm-config-volume
      - name: vcloud-ccm-vcloud-basic-auth-volume
        secret:
          defaultMode: 420
          secretName: vcloud-basic-auth
status:
  availableReplicas: 1
  conditions:
  - lastTransitionTime: "2022-01-31T17:02:50Z"
    lastUpdateTime: "2022-01-31T17:02:50Z"
    message: Deployment has minimum availability.
    reason: MinimumReplicasAvailable
    status: "True"
    type: Available
  - lastTransitionTime: "2022-01-31T17:00:35Z"
    lastUpdateTime: "2022-01-31T17:02:50Z"
    message: ReplicaSet "vmware-cloud-director-ccm-b5d58cd57" has successfully progressed.
    reason: NewReplicaSetAvailable
    status: "True"
    type: Progressing
  observedGeneration: 1
  readyReplicas: 1
  replicas: 1
  updatedReplicas: 1
Search for:
projects.registry.vmware.com/vmware-cloud-director/cloud-provider-for-cloud-director:1.1.0.latest
Version 1.1.0.latest is needed for the following steps.
A little bit of background on SSL load Balancers
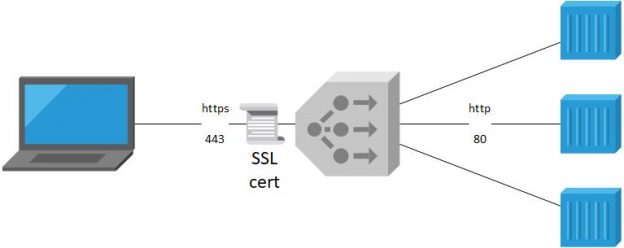
When creating a Load Balancer of encrypted traffic, you have to decide where your encryption endpoint should be hosted.
We differentiate between two possible architecture:
- SSL Termination on the Load Balancer
- SSL Passthrough
Here you can find more details on the different SSL Load Balancer Architectures.
In our use-case, exposing SSL workloads, running on a TKGm cluster created by CSE, SSL termination is the supported architecture.

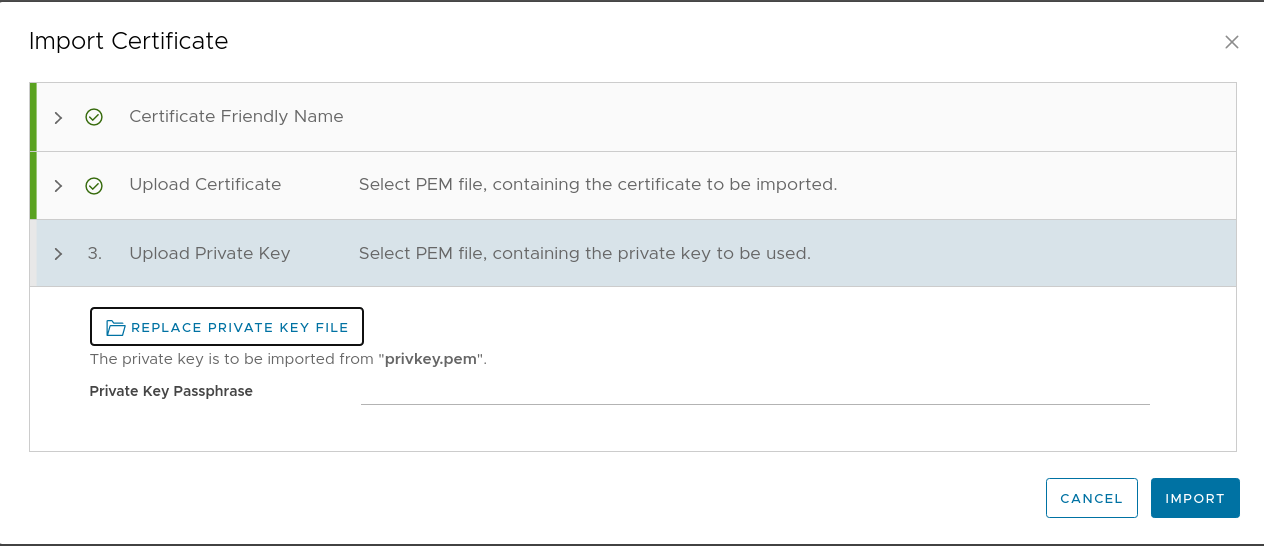
We need to create a NSX Advanced Load Balancer with an SSL certificate for the endpoint. The traffic will be forwarded from the Load Balancer as http traffic to the containers.
How to configure a service using SSL termination and a custom SSL-certificate
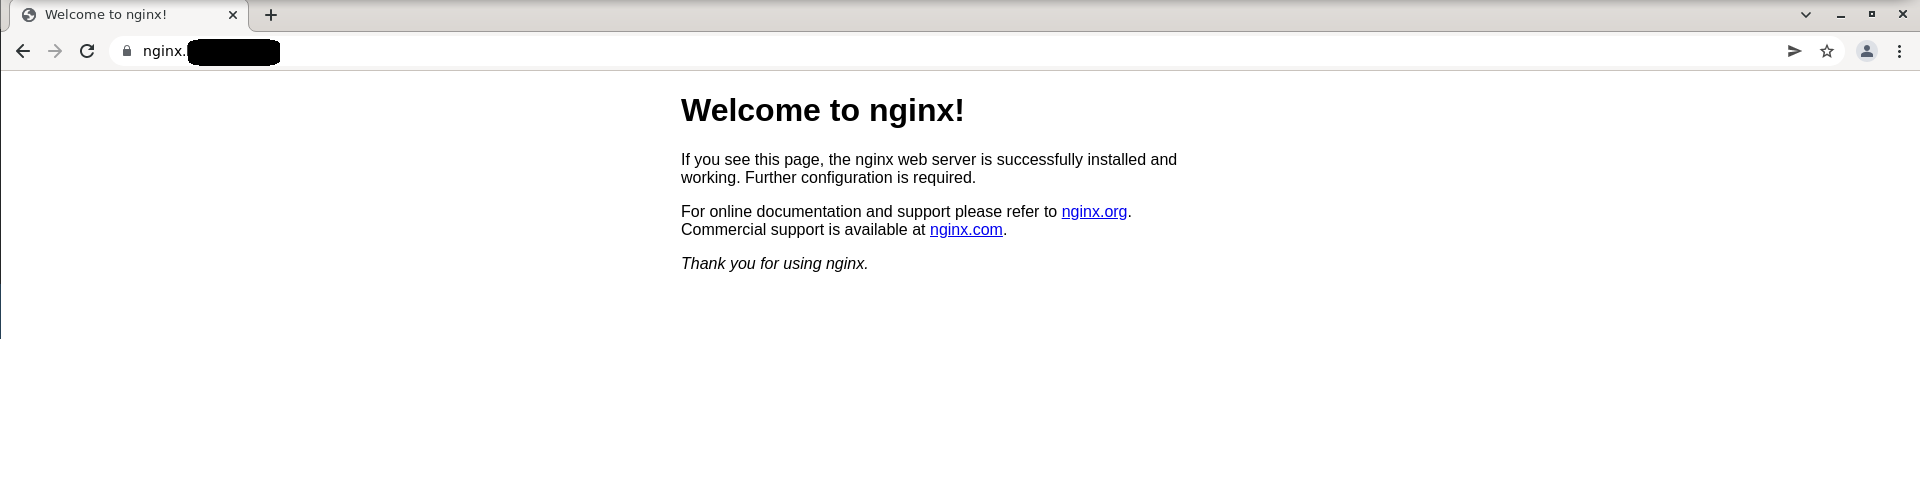
I will show in the following, how to expose a NGINX deployment using https.
First of all, you have to create a deployment:
kubectl create deployment nginx --image=nginx --replicas=2
To expose a service using SSL termination you need to add the following annotation to your service definition:
annotations:
  service.beta.kubernetes.io/vcloud-avi-ssl-ports: "443"
  service.beta.kubernetes.io/vcloud-avi-ssl-cert-alias: "my-service-cert"
You need to replace my-service-cert by the name of your certificate.
The easiest way to create a service accordingly, is to run kubectlwith the --dry-runoption:
kubectl expose deployment nginx --type=LoadBalancer --port=443 --targetPort=80 --dry-run -o yaml > nginx-svc.yaml
After adding the annotations, your nginx-svc.yaml should like look the following:
apiVersion: v1
kind: Service
metadata:
  annotations:
    service.beta.kubernetes.io/vcloud-avi-ssl-ports: "443"
    service.beta.kubernetes.io/vcloud-avi-ssl-cert-alias: "my-service-cert"
  labels:
    app: nginx
  name: nginx
spec:
  ports:
  - port: 443
    protocol: TCP
    targetPort: 80
  selector:
    app: nginx
  type: LoadBalancer
status:
  loadBalancer: {}
Excute kubectl apply -f nginx-svc.yaml and you are done: